4 Installing a Git Client
You’ve now installed Git, GitHub, and you’re ready to get going! Much like most pieces of software, we can interact with Git via a command line or using a graphical user interface (GUI). There’s a small vocal minority of people that proclaim that you can’t learn Git with a GUI (aka Git client), but don’t listen to them! There are plenty of good Git clients out there that make the basic commands simple, and provide a visual for more complicated ideas. I prefer to use the GitKraken client, which is free to use for students and academics if you sign up to the GitHub developer pack, but only allows access to a limited number of private repositories otherwise, so you may want to explore other options if that’s you. GitHub for Desktop is made by the GitHub team, so as you can imagine it is tightly integrated with GitHub. Whether this is a pro or a con will depend on whether you think you’ll explore other remote hosting services, but the reason I’ve avoided it is that it doesn’t have a method of visualizing branches. You’ll have to decide for yourself if this is a deal-breaker for you and your workflow. If you use VSCode as your development IDE, there’s a built in Git client (the Source Control panel), and you can install the Git Graph extension to visual branches. The GitLens VSCode extension is also worth installing, and now offers paid features to further extend its use, although if you have a GitKraken Pro account you get these for free. In case you come across it in other recommendations, SourceTree was another good alternative, but I have had some issues connecting to some GitHub accounts, and it has limited support, so I have since moved away from it.
As you get a better understanding of Git, you may want to use the command line as it can be quicker to use, and is more powerful. If you decide to go this route, I’d recommend looking at the lazygit plugin which brings a GUI to the terminal, enabling you to get (most of) the best of both worlds. It’s a little out of the scope of this workshop, but there are some useful video tutorials linked on lazygit’s GitHub page.
4.1 Connecting GitKraken with GitHub
Assuming you use want to use GitKraken, you can connect it to GitHub to make for a much smoother experience. The full details are laid out in the GitKraken documentation, but in summary:
- When you set up GitKraken for the first time, choose “Sign in with GitHub” to use OAuth to log in to your GitHub account and create a link with the GitKraken application
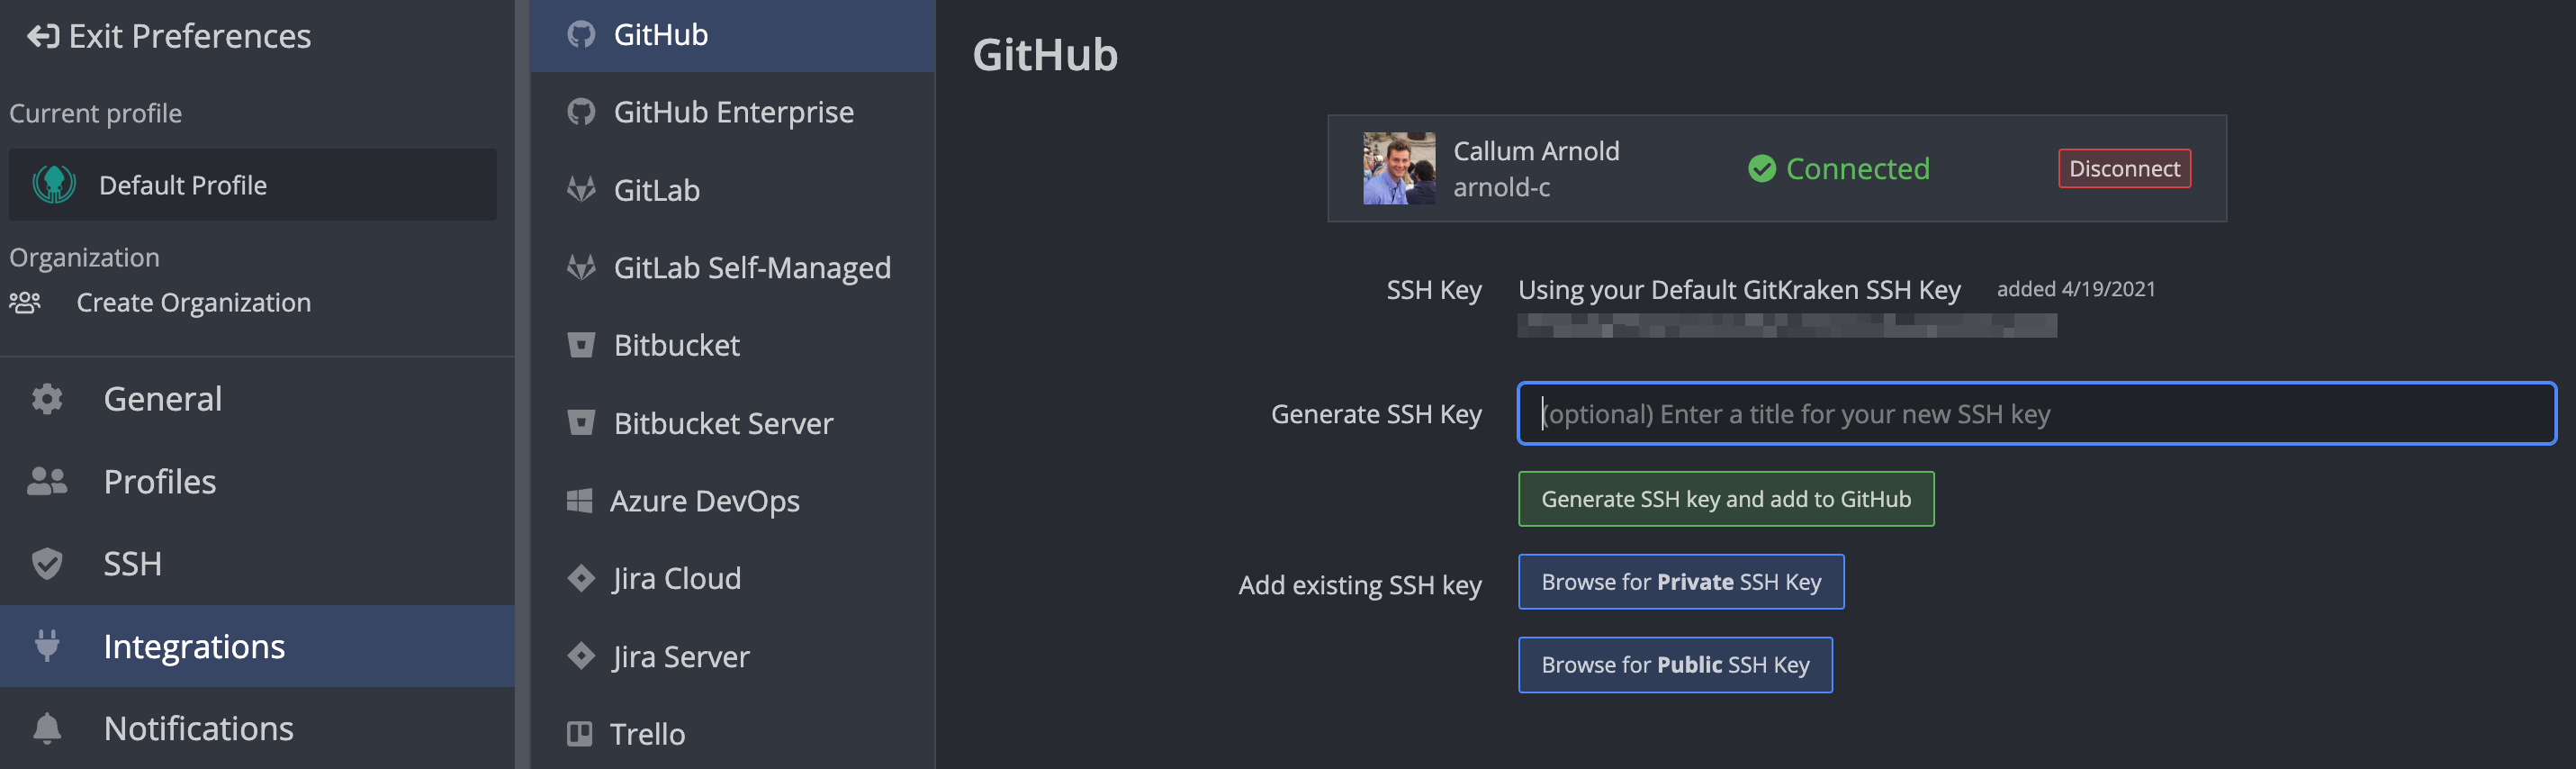
- Open up the “Preferences” window and navigate to “Integrations” then “GitHub”
- Make sure it shows your GitHub account as “Connected”
To connect your local Git installation with GitHub, you may want to use SSH keys. GitKraken makes this super easy. From the “Preferences > Integrations > GitHub” window, enter a name for your SSH key e.g., github-ssh and click on the “Generate SSH key and add to GitHub” button. It’s as simple as that!
If you would like to manually create your SSH keys, you can do so using the instructions linked here, and then use the “Browse for Private/Public SSH Key” buttons to point to the location you saved your SSH keys. On a Mac and Linux, the default location is ~/.ssh/. If you have not already added your public key to GitHub, GitKraken should detect this and provide you with a button to do so. You could also add these keys through the “Preferences > SSH” window where the “Browse for Private/Public SSH Key” buttons also appear.